
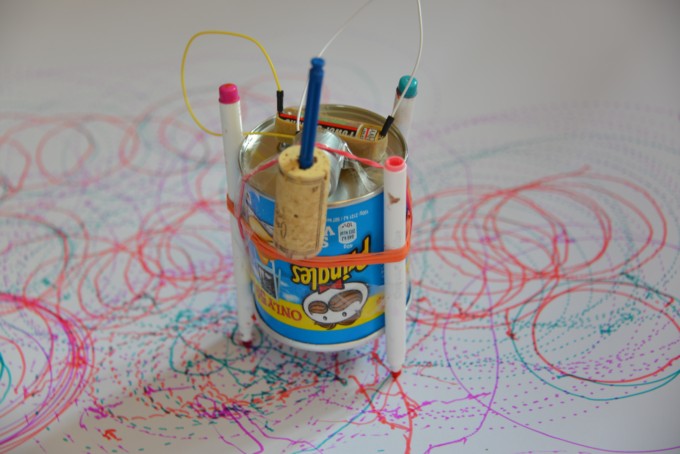
Art Bots or Scribble Bots are great fun and provide many investigative opportunities. This simple version uses a small motor and pens fixed around a pot. The motor makes the arm ( glue stick or cork ) spin, which in turn makes the Scribble Bot move.
Pupils can be given challenges, such as finding a way for the Scribble Bot to draw a dotted line or left to explore, freely going through an iterative process of designing, testing and amending their ideas.

How to make an Art Bot
Scribble Bot Materials
Small motor 1.5 -3 V( U.S link http://amzn.to/2bo57nn )
Thick elastic band 2 in x 1/2 in
AA Battery
Double-sided tape or strong glue
Pringles can or another small container
Two leads
Paper
Felt tip pens ( U.S link http://amzn.to/2bChQ9I )
Roll of paper – we like this Melissa and Doug roll ( U. S link http://amzn.to/2bo1qhq )
Instructions for making a scribble bot
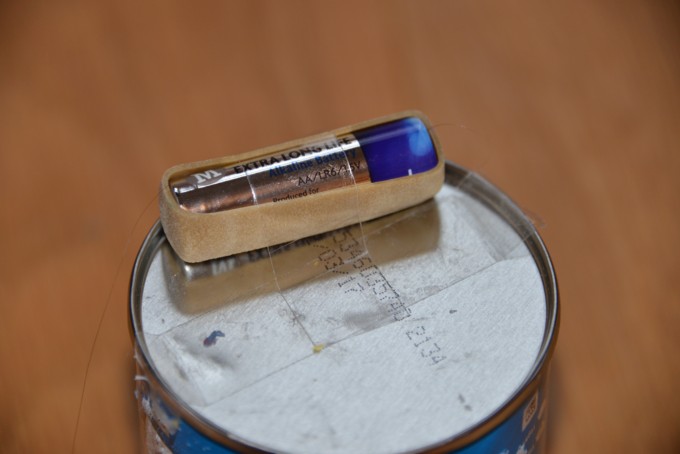
Place the thick elastic band around your battery and sellotape it to the top of a pringle can or similarly shaped container.
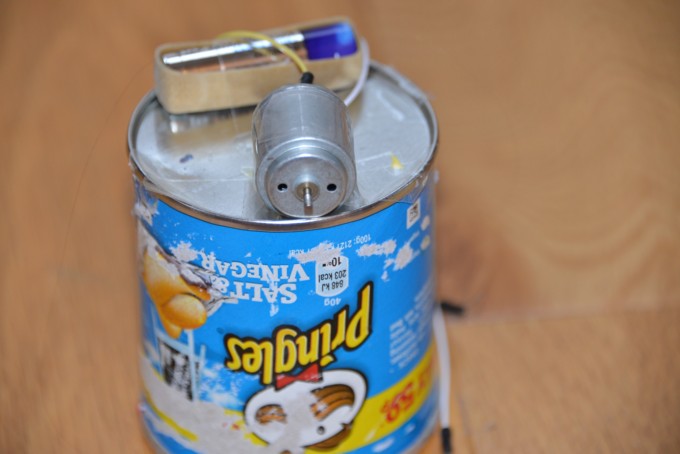
Attach the motor to the top of the container; it needs to be close to the edge so the arm can spin freely.
Attach the leads to the motor and battery. The elastic band is perfect for holding the wires in place at each end of the battery, as they can easily be removed to turn the motor off.

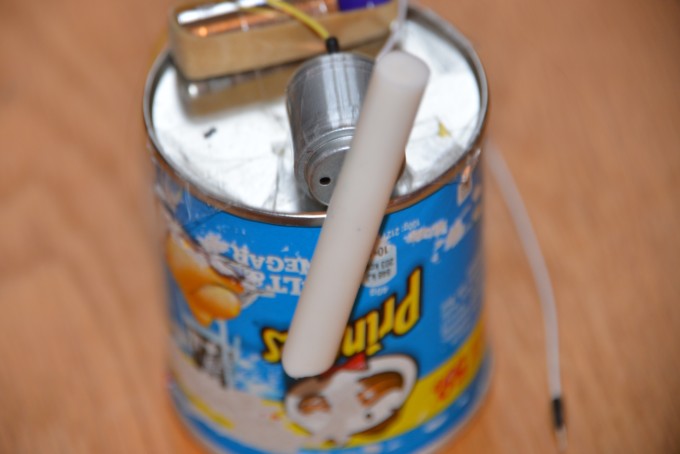
Attach a glue gun stick to the motor and test to ensure it spins.
You can experiment with different lengths of glue sticks or other items such as corks or even plasticine.
Attach four felt tip pens around the sides.
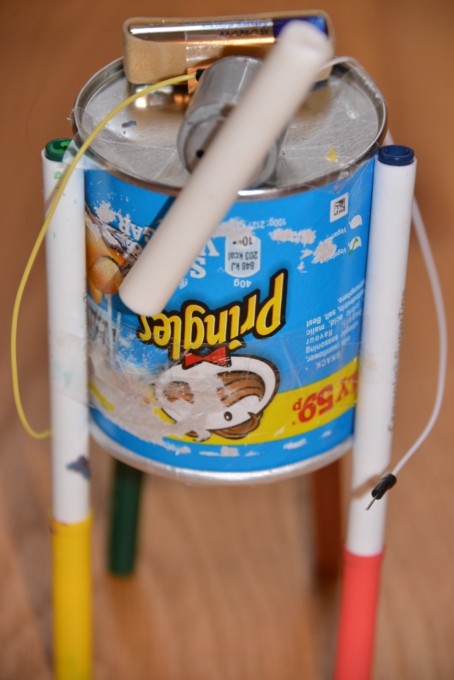
Remove the lids and let your Scribble bot loose on paper.
More Art Bot Activity Ideas
Experiment with different types of mark-making materials:
- Chalk
- Paintbrushes
- Pencils
Experiment with different materials on your motor as the arm
- Different lengths of glue stick
- Cork
- Plasticine
Investigate what happens if you move the arm off-centre; we added a piece of K’nex to the one end of the cork in the picture above, which made a dotted line. A central arm made a smooth line.
Placement of the pens
Try the pens higher and lower and investigate how this changes the drawing.
Could you add a trailing pen behind or to the side of your scribble bot?
Can you add a switch or buzzer to your circuit?

More STEM Challenges using an electric motor
Once you finish the drawing robot, the motor and battery can be used for many other STEM challenges.
Make a mini motorised boat. You’ll need a small propeller for this and the motor and battery.

Design and build brushbots. These are brilliant as children can use their imagination to make the brush bots look however they want and add fun decorations and extra features.

Lemon Lime Adventures also has a brilliant motorised toy car.
Last Updated on February 6, 2023 by Emma Vanstone


We made this; hours of fun!
This looks like so much fun! Thanks for the great step-by-step tips!
Thanks for this great post! I used it as inspiration when we built our scribble-bots in the Robots theme week of the Family Inventors class I teach for 3 – 7 year olds. See our process and results here: https://inventorsoftomorrow.com/2017/05/22/scribble-bots/
it is very helpful and interesting way to make art bot
thanks a lot