Did you know you can use a potato (or two) to create enough power to light an LED? We did try a small light bulb as well, but our potato battery only had enough power to light an LED.
You might have seen our lemon battery activity which is very similar to this one! I’m going to show you how to make a potato battery in just a few easy steps.


You’ll need:
2-3 Potatoes
Knife
Copper and silver coins (or a galvanised nail) Copper and zinc strips also work well.
3 wires with crocodile clips attached
Voltmeter ( optional )
Potato Battery Instructions
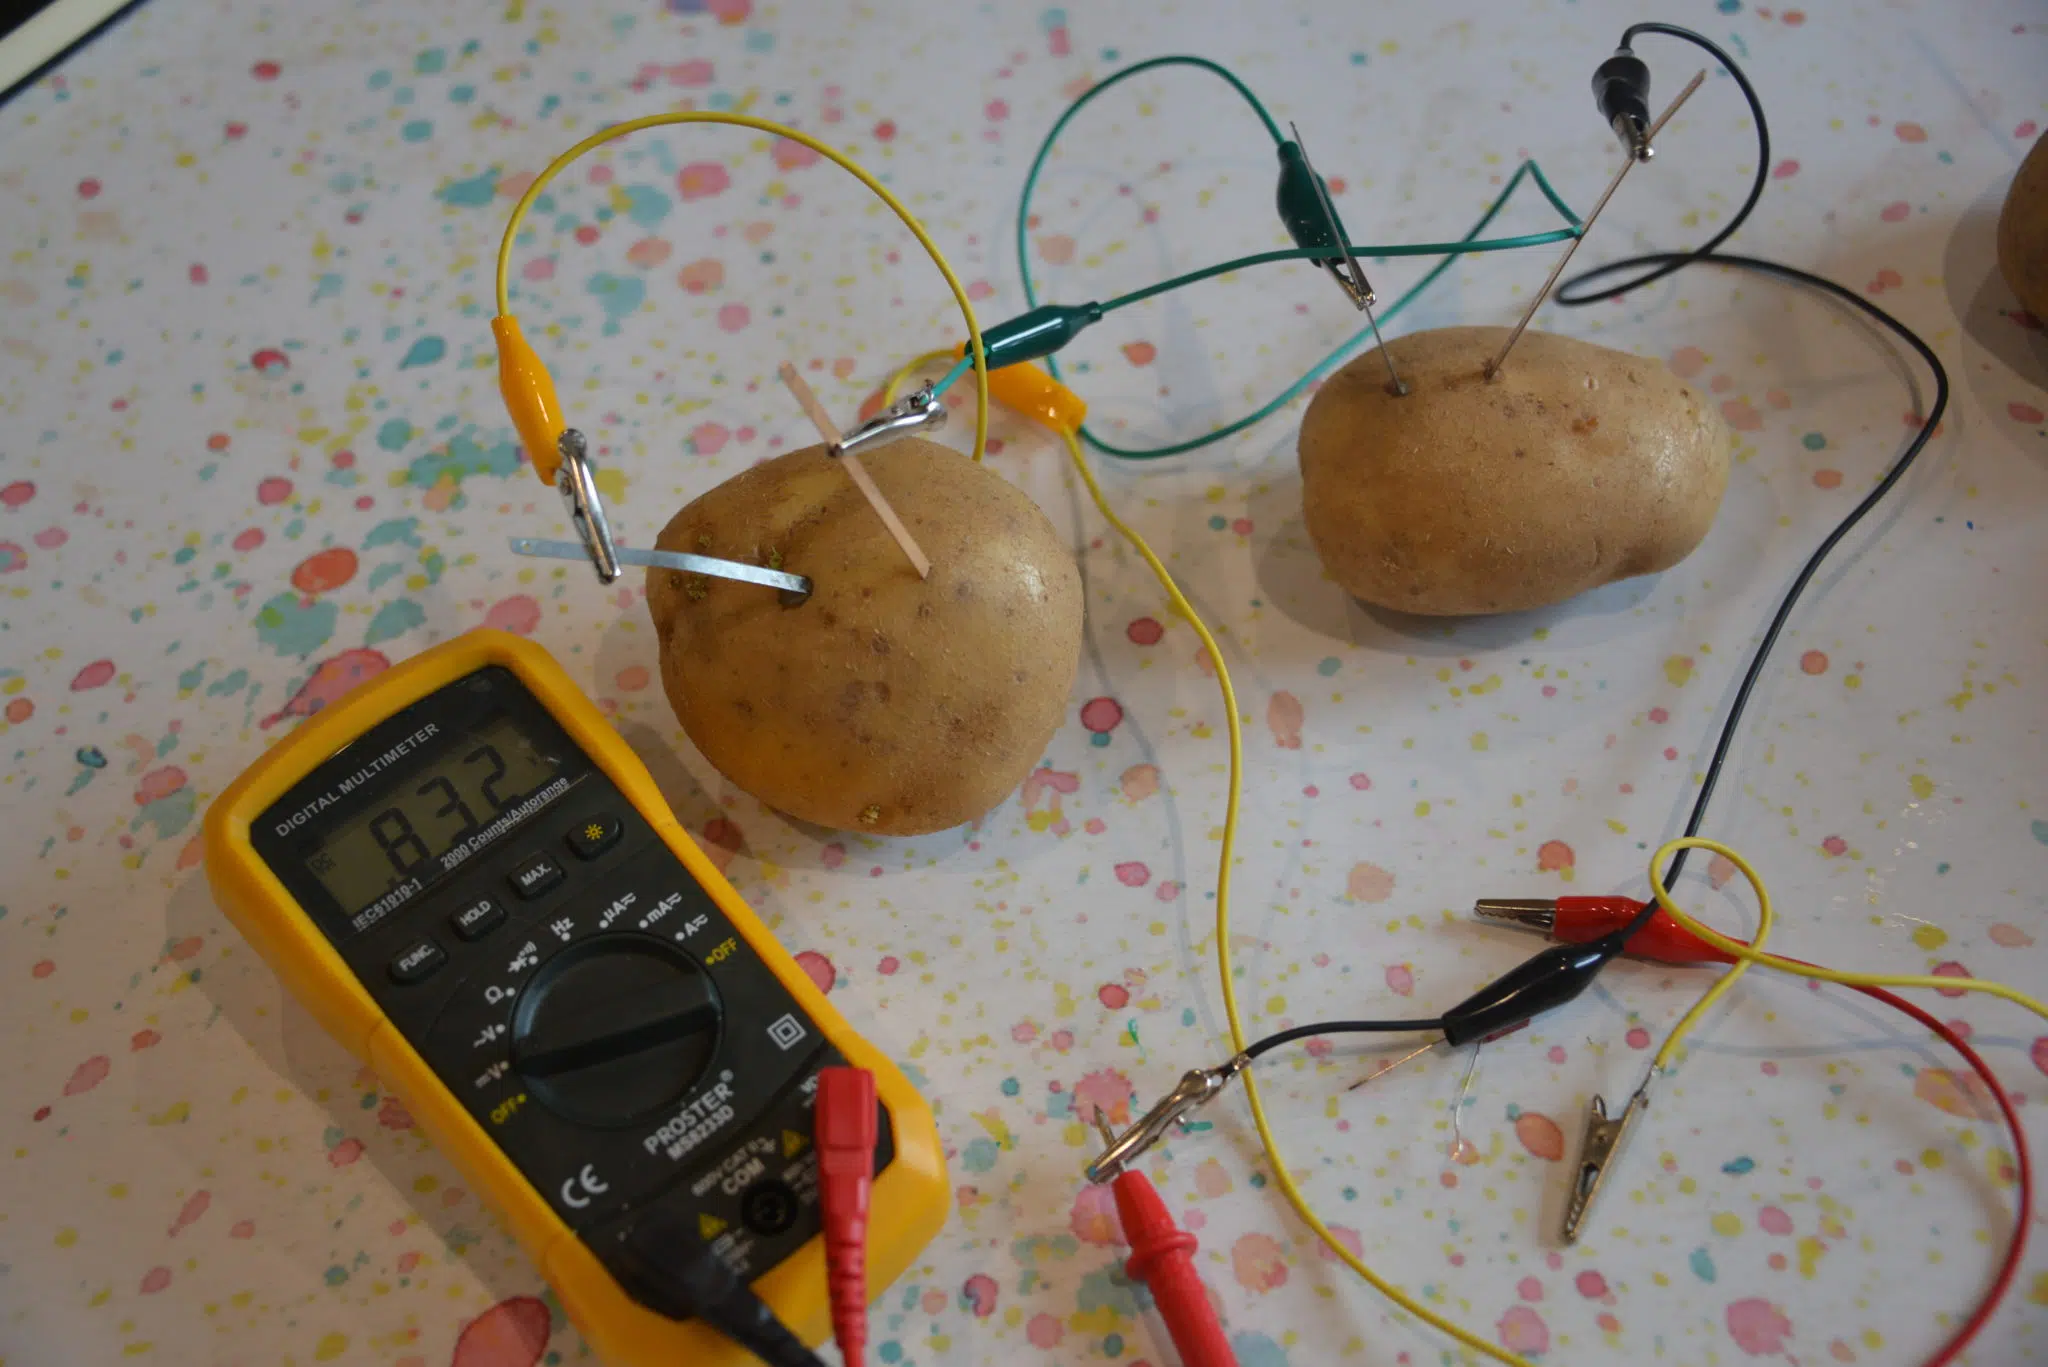
Carefully make two slits in each potato with a knife ( ask an adult to help ).
Place a copper coin and either a silver coin or a galvanised nail into each potato.
Attach the potatoes to each other using wires and crocodile clips. The copper of one potato should attach to the zinc of another potato to work.
If you have an LED, 2 potatoes should be enough to light it. You can also use a voltmeter/multimeter to measure the voltage passing through.


How does it work?
How does a potato battery work? Find a full explanation over on my lemon battery post!
More electricity projects for kids
Find out how to make your own torch using a simple circuit and a cardboard tube.
This drawing robot is great fun to make as well!
Or try one of my other easy electricity projects!
Last Updated on March 18, 2022 by Emma Vanstone