
We’re making the most of the cold weather by sticking with our ice theme this week. This ice painting science activity is super simple and great fun. I just wish I had a bigger freezer to make a larger sheet of ice.
Materials for ice painting
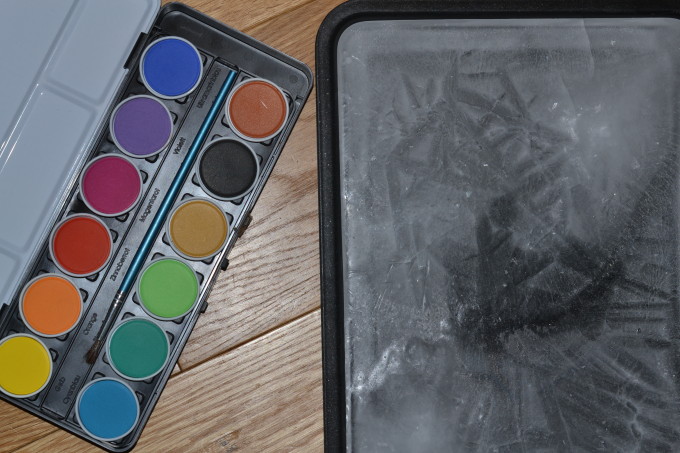
Tray ( I used the cheapest oven tray I could find )
Water
Water-based paints
Felt tips
Paintbrush
Kitchen roll or paper towels
Paper
Instructions for painting on ice
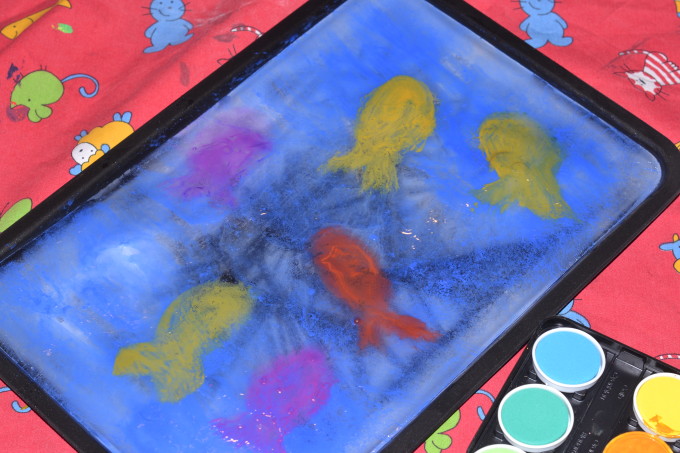
Freeze water in your tray so you have a sheet of ice.
Paint on the surface of the ice.
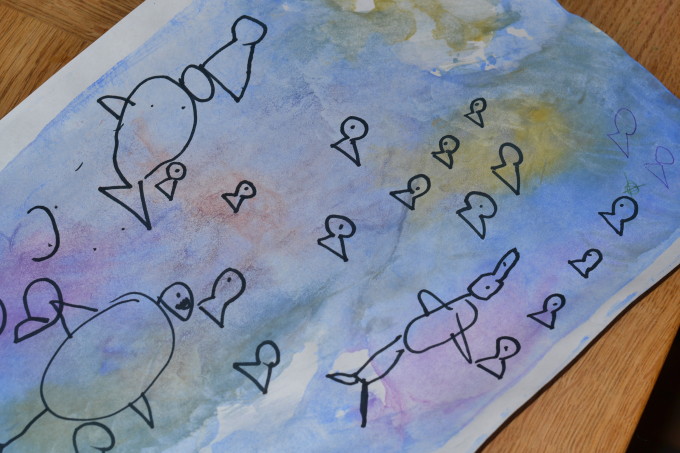
Place the paper on top and press down gently, rubbing all over.
Leave your paper to dry.
Wipe the remaining paint off the ice and paint again!
Decorate your ice paint picture.
Questions to ask about ice
How does the ice feel? Is it slippery? Sticky*?
Does it get harder or easier to paint as the ice starts to melt?
What happens to the paint as it mixes with the water? Do the colours get more diluted?

More Ice Experiments for Preschoolers
Leave water in a big tray to freeze outside on a very cold day. I’ve left some in our tuff spot, hoping that one morning we’ll wake up to a lovely big fresh sheet of ice.
Try some easy ice fishing!

Make instant ice like Raising Lifelong Learners.
Investigate to find out if there’s a difference if you paint the ice indoors or outside on a cold day. Find out if paint freezes on fresh ice.
Experiment with different types of paper. Which absorbs the paint the best?
*Ice can feel sticky when you remove it from the freezer as it immediately freezes the moisture in your fingers.
Suitable for EYFS
Key Stage 1 – properties of materials
Follow Science Sparks on Facebook for 100s more science activity ideas for kids.
If you enjoyed this activity, don’t forget to check out some of our other preschool science experiments, too!

Last Updated on January 22, 2024 by Emma Vanstone


